
Some painting lessons that I do with students are just infectiously fun. The students are having such a good time painting and discovering what they can do with color that it makes me want to pick up a paint brush and do my own. I thought I’d share one of these lessons.
This lesson is part of a unit that I do with 3rd graders that helps to answer the very large essential question, “How has the definition of art changed over time?.” We talk about art, in terms of landscape paintings, before Claude Monet and how important it was to make things look realistic for them to be considered good. Then we discuss how important Monet was in changing that idea because he tried to capture light and in the process, made things look a little blurry and fuzzy. Not a popular artist immediately, he changed the art world by making it acceptable to not paint realistically. After doing a few activities focusing on Impressionism, we move onto David Hockney and a discussion about how art has become more abstract over time. Although it’s fun and engaging to teach the other stuff, it’s when we move to our Hockney-inspired landscapes that it gets really fun!
I designed this project from a mix of a few sources. The method behind the project is based on a landscape lesson from the book Children and Painting, by Cathy Weisman Topal. The Hockney painting that serves as inspiration for our own paintings is Garrowby Hill, 1998.
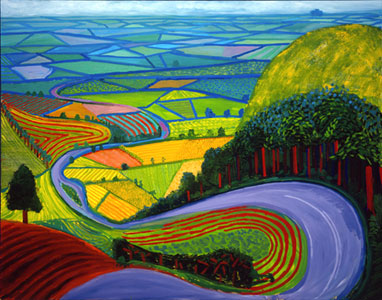
Garrowby Hill, David Hockney, 1998
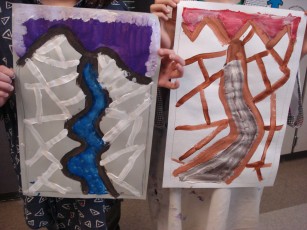
First, students begin by painting the horizon line and a river or a road. Then, they divide the land into smaller sections to show fields, mountains, woods, and/or deserts.
After talking about how Hockney did not always use “normal” colors, students began to fill in their divided areas with color. Students were encouraged to mix tints and shades to create deeper and richer colors. And that’s were their excitement takes off! I don’t think students get/take time to “play” with paint.
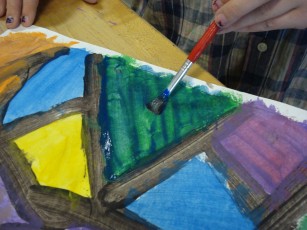
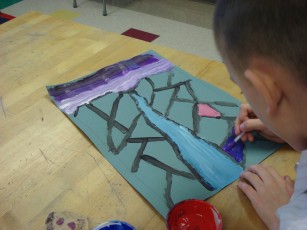

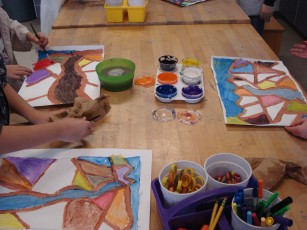
Finally, students added “details” to their land areas with pattern and texture.
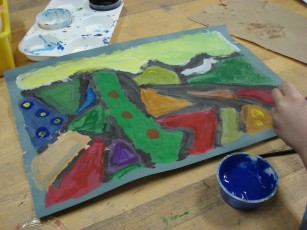
Don’t these masterpieces look great?!?!


